Monday, 11 February 2013

New clutch.

The clutch disk was much below the replacement limit. It was worn down to the rivets which than scored up the flywheel. Unfortunately the glazed and badly worn flywheel could not be resurfaced, so I had to a good used one. The new one is from an olde model, a 1984, therefore some pickups for a magnetic sensor are mission, but that's not a concern. That particular sensor is normally capped off in the engine bay, and only served some factory diagnostic function.

The vibrations I was getting during initial engagement into 1st gear, are now obviously due to the warped and badly glazed flywheel.

The new disk is about 8mm thick, while the old was 5mm. The original disk would have been rubber centered, so the clutch I am putting in now is at least the 3rd. Based on the mileage of the car, I doubt it would more than that. 
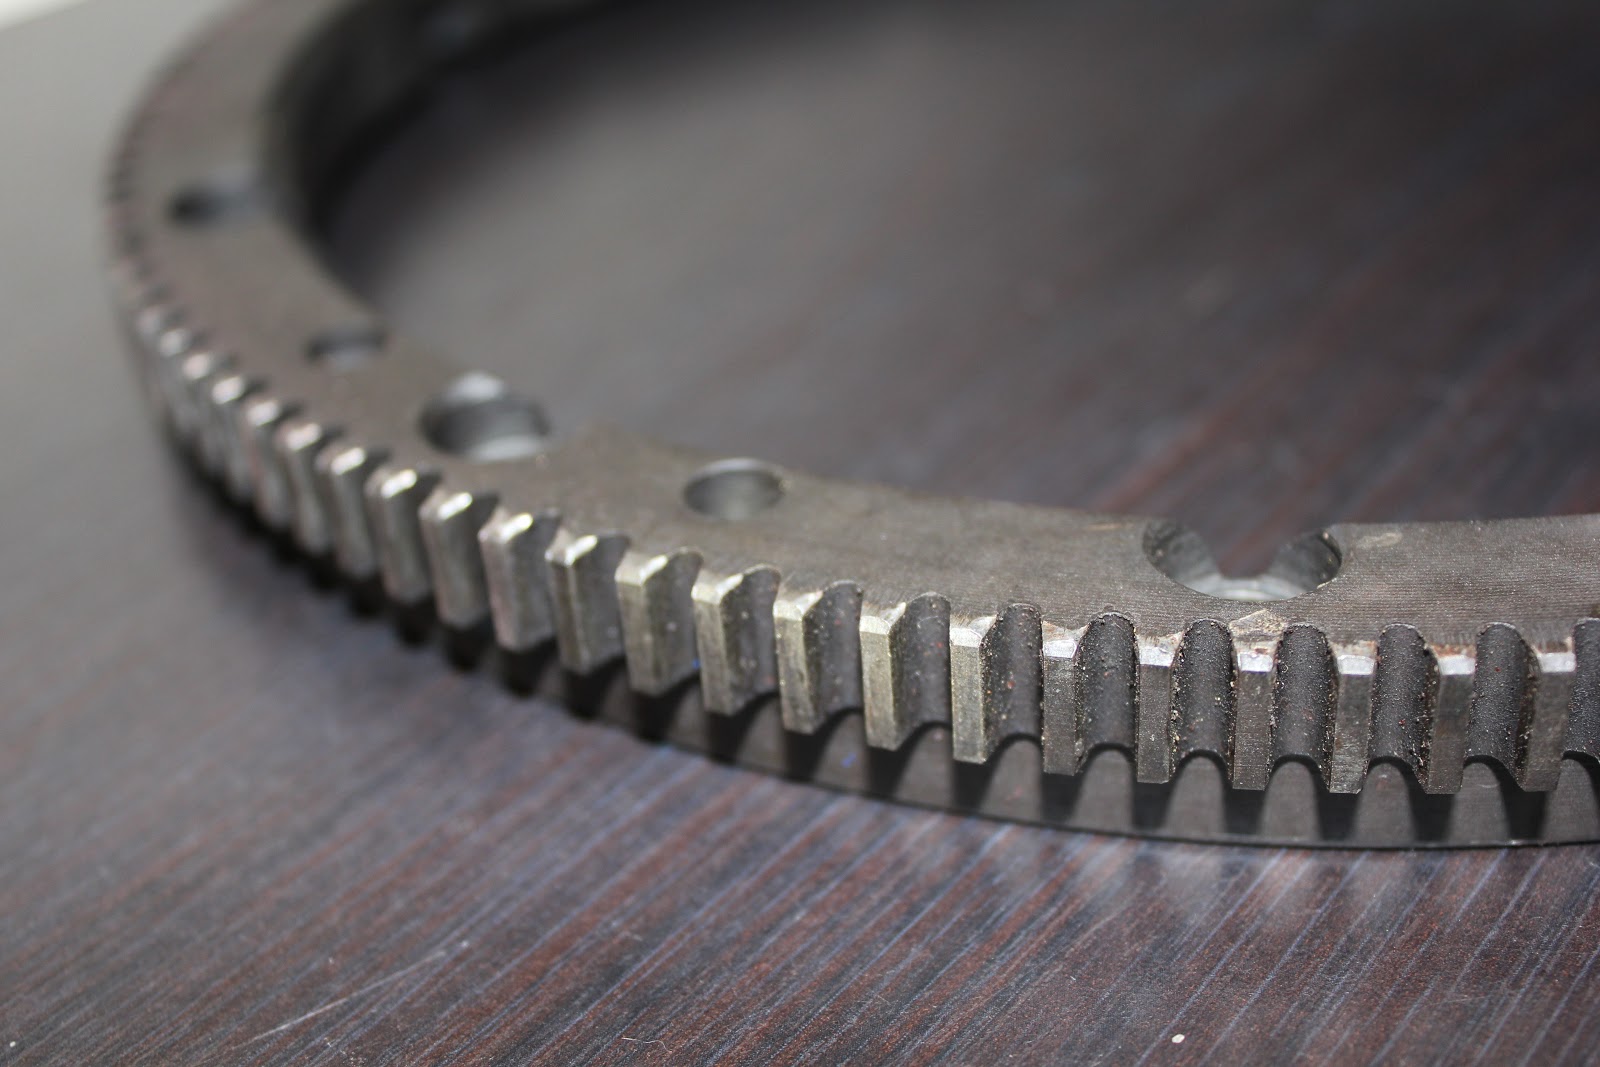
The starter ring gear bolts on to the pressure plate. I re-indexed it, so the engagement on the compression stroke wears a different set of teeth.
Using a couple of sockets inside each other (3/8" inside a 17mm), I aligned the clutch and installed the pressure plate.
A bit of red paint will show if any of the bolts have loosened.
  The clutch cover was pretty dirty, so a quick bead blast revealed some fresh aluminum.
Starter wires routed with new Adel clamps, and slave cylinder refitted.


Tuesday, 1 January 2013

RMS (Rear Main Seal)

Removed the RMS. Driving a screw and pulling on it with vice grips works every time.
I've heard these things are notorious for leaking. Having it fail shortly after install would be nightmarish given the amount of work required to access it.

There is a tab in the block that was engineered to facilitate removal. If the seal is not inserted deep enough, and past flush, it will leave a gap and oil will leak. The seal that was in there had silicone filling this gap, but the manual does not mention doing so.
We can see that barely any material would do any actual sealing if the silicone were not there.

I installed a new seal until it bottomed itself on a machined stop inside the block. That's the season it's there. The seal seemed to have gone in pretty deep. I measured it to be about 3.25mm past the flange.

As an extra precaution, after installing the seal, I put a thin bead of RTV around the edge, and filled the removal tab.


Thursday, 22 November 2012

Transaxle removal.

Removed the lockwired bolt in order to disconnected the shift linkage rod. After removing the shift lever which is held on to the torque tube by two bolts, I pushed the linkage forward through the insulation.
Rubber access panels reveal bolts that retain the tranmission to torque tube coupling.
Once the two bolts are removed, the coupling is pushed aft towards the transmission.

Six tripple square bolts hold the axles to the stub shafts on the transmission. Bagging the CV joints will prevent the grease from getting contaminated. I used a ratcheting strap to fix the transmission to the jack. Random scraps of wood steady the transmission.

4 bellhousing bolts can be removed to fully separate the transaxle from the torque tube.
The reverse light switch and speedo sensor also need to be disconnected.

Lastly the nuts of the two bolts from the upper mount can be removed, and the bolts pushed out.


The transmission is quite heavy. Tilting it aft as it was being lowered is the way I maneuvered it out from under the car.

Saturday, 13 October 2012

Manual rack.

The power steering system in the 944 is said to be plagued with leaks. I replaced all return lines with new fuel hose, and resealed the pump. Unfortunately the pump still leaks. The housing might be warped, since I am sure the o-ring is not pinched. I will have to remove it, and do some further investigation.

1983 944 models came with a manual steering set up. I find this to be an attractive option due to the reduced engine bay clutter, maintenance, weight, and fluid leaks. Increased road feel, and driving feedback will also be nice gains.

Good thing I found one.
Disassemble, a good clean, and some media blasting, make it look factory fresh.
As always some primer, and black engine enamel were administered.

The inner tie rods are very expensive, and hard to find. I found some similar VW ones at a fifth of the price. A vital, and often ignored stop ring, will not fit the VW tie rods. Some machining will solve that problem.

Front brake rebuild.

While at the local Pick-A-Part, I noticed that the front brakes from an 1980 Audi 5000S were the same as the ones on the 944. I bought the set for about $30.

After removing 30 years worth of rust, I painted them with VHT caliper paint. While the wife was away, the got baked in the oven so the paint would cure. Also installed new seals. All I need now is some stainless steel brake lines.

Front and rear shocks.

Sachs for the front, and Bilstein for the back. I don't trust the longevity of cheap brands like KYB. Adjustable Koni shocks would have been nice. Maybe next time. 

The original front shocks came out in pieces. All the oil had drained out, and filled the housing they mount in. Removing the top nut can be accomplished with the use of an impact wrench, or by holding the absorber shaft with an allen key. I had to improvise and use a socket and some vice grip pliers, since the nut sits in a recess that a standard wrench can not access.

The rear shocks were so easy to change, that I did not even need to jack up the car. Two bolts is all what was needed to be removed.

Hopefully this solves some of the vibration issues I had. If not, the leaky motor mounts that I replaced just after doing the shocks, definitely will. Meyle is the brand of mount I chose. Can't justify the price of OEM Porsche ones. Some say aftermarket mounts are a waste of time and money.... I guess we shall see.


Thursday, 16 August 2012

Electric mirrors.

Two separate switches are used. One (double throw double pole) switches from the left and right mirror, and one 5 pin joystick moves it around. The wiring diagram was a bit confusing, so I coloured it.


The colors are random,
Purple = Positive
Brown = Negative 
They are the inputs, that the joystick (Mirror Switch) distributes to the motors. The joystick also has to change the polarity of the outputs, so the motors can move in the other direction. There are only two motors per mirror. Obviously, one for vertical, and the other for horizontal movement.

The DPDT switch was easily tested, and it was fine.
The problem is deffinitely the joystick switch.

So.. pins 2 (12v) and 4 (Ground) always need to be present. Pin 3 is common to all motors, which leaves pins 1 and 5 that are are the controls to their individual axis on a motor.

Based on the above logic:
1&2 and 3&4 move the mirror up
to move it in the opposite direction we reverse polarity so..
1&4 and 3&2  move the mirror down
And the other axis:
3&2 and 5&4 move the mirror left
3&4 and 5&2 move the mirror right

Tested the mirrors by jumping the pins where the joystick connects, and all looks to be fine.
My options are replacement of the joystick with a new unit for almost $100, or manufacturing something that involves 4 momentary DPDT switches. The latter will not fit in its original location so I would have to hide my non OEM shame in a different location. The third and most logical solution is to buy a used one.