Wednesday 1 May 2013

Dead Starter

The starter finally gave up the ghost. One day it started, and the next... nothing..... Upon disassembly I noticed that 2 of the brushes were missing all together, and the other 2 were worn down to the wire lead.

I decided to take the whole thing apart, since it was full of grime and carbon.

After a decent clean, I lubed the drive, and put it back together.


Sourcing new brushes was difficult, so I raided the local wrecker. Bosch made starters for many different vehicles of that era, so eventually after dismantling a few similar shaped ones, I found the correct brushes. They have a bit of life left in them, but that's fine since this is only a temporary fix.
After final reassembly, I connected it to a weak battery I have laying around, and tried it out.
Testing the starter.

Tuesday 23 April 2013

Fuel quantity indication

Drained the fuel tank, since I had some 2 year old fuel in there.
Cleaned up the pre-pump fuel stariner....
.....and installed it with a new seal.

My fuel quantity has read very low. I assumed the sending unit was at fault, so I removed it for troubleshooting.
All the contacts were clean, and free of varnish. The resistance check showed normal operation.

The gauge in the cockpit has become suspect.
Upon removal and disassembly of the instrument cluster, the contacts showed a bit of corrosion.


Fine crocus cloth, scotch brite, alcohol, and a dielectric sealant/grease are the tools for the job. The Grote Ultra Seal compound is made in Canada.

The pinned "football" connector is held in place by a nut and washer. The washers cracked, so I replaced it with a lockwasher.
I jumped a few connections to go some testing, and the gauges seem to be working much better, but I will know for sure when I fill up.


Stripped exhaust stud hole

Fwd stud on #2 cylinder will not hold torque. I did notice the hole having the first few threads stripped, but left it alone, thinking it wouldn't pose a problem...... Wrong. This definitely would have been a piece of cake to drill, tap, and install a timesert when the head was off.
Having no room for a drill and not owning an angle drill really complicates things. Access is limited, and the engine is also slanted. A 1/4 drive wrench with a 12 point 9/32 socket was used to drive the drill, counterbore, and tap.
The hole is prepared and cleaned.
Timesert installation finally complete. It can be done, but it's a bit of a challenge.
Note, the number 2 stamped on the block, under the aft exhaust stud hole. It stands for piston tolerance group 2. 0 and 1 would be the other options.

Tuesday 9 April 2013

Reassembly.

Scotchbrite lubricated with alcohol cleans the deck quite nicely. Valve reliefs got cleaned also.
The TURBO headgasket is the only one available, and can be used on all 8V cars. I wonder what, if anything, has been changed about it. Maybe stronger seals around the pistons?
Head is torqued in 3 stages. Camtower gasket is in place.....
Finally the tower is installed. Chipped the paint on it a bit, but it will do. Hard to avoid it when removing and installing several times. It had better stay in its place for a while.
This was  a good opportunity to replace the old, brittle, plastic heater control valve. When it cracks, it has been reported that the clutch gets shower with coolant.... not a good thing. The one I installed is metal, and  made for an Audi 5000 (part number: Four Seasons 74671). Hopefully it performs just as well as it fits. Vacuum and coolant ports are the right sizes.
Intake manifold and fuel rail are back in, so it's starting to look more like an engine.
 
My 4-angle 1-1/16 wrench works pretty well for tensioning the belts. Plenty left to do, but I'm definitely past the half way point.
Taken from underneath the car. The alusil block has a neat look, it's much shinier than the aluminum used for the head.


Sunday 7 April 2013

Valve work.

After I had the cylinder head resurfaced at a local shop, it was time to refit the valves. Replaced the exhaust valves with new sodium filled ones from the 944 turbo.
Lapped all of them to refresh the seats, and checked the contact area with prussian blue.

Leaky old valve stem seals needed replacing.Minimal effort was required to push them onto the valve guide.

A large c-clamp was needed to compress the two valve springs. The overhead style compressor could not hook under the internal spring.

I like the tipple ribbed keepers, they look pretty effective.

Wednesday 3 April 2013

Coolant leak.

A few months ago I noticed a bit of coolant pooling under the intake manifold. I was also able to smell it... that sweet nauseating smell.

It looks to be coming from between the block and the head..... No fluids don't seem to be mixing, no white smoke out the exhaust, and the compression numbers were really good.

After putting the clutch back together I was able to run the engine, and found that it was indeed the head gasket. An external leak, probably due to a deteriorating 27 year old gasket.

I made a video pinpointing the leak. Porsche 944 coolant leak from head.

Headgasket change.... it's a shame that I have to take the engine apart again.
The pintle caps one two injectors decided to stay behind.....
...but they clicked back in place with no problems.

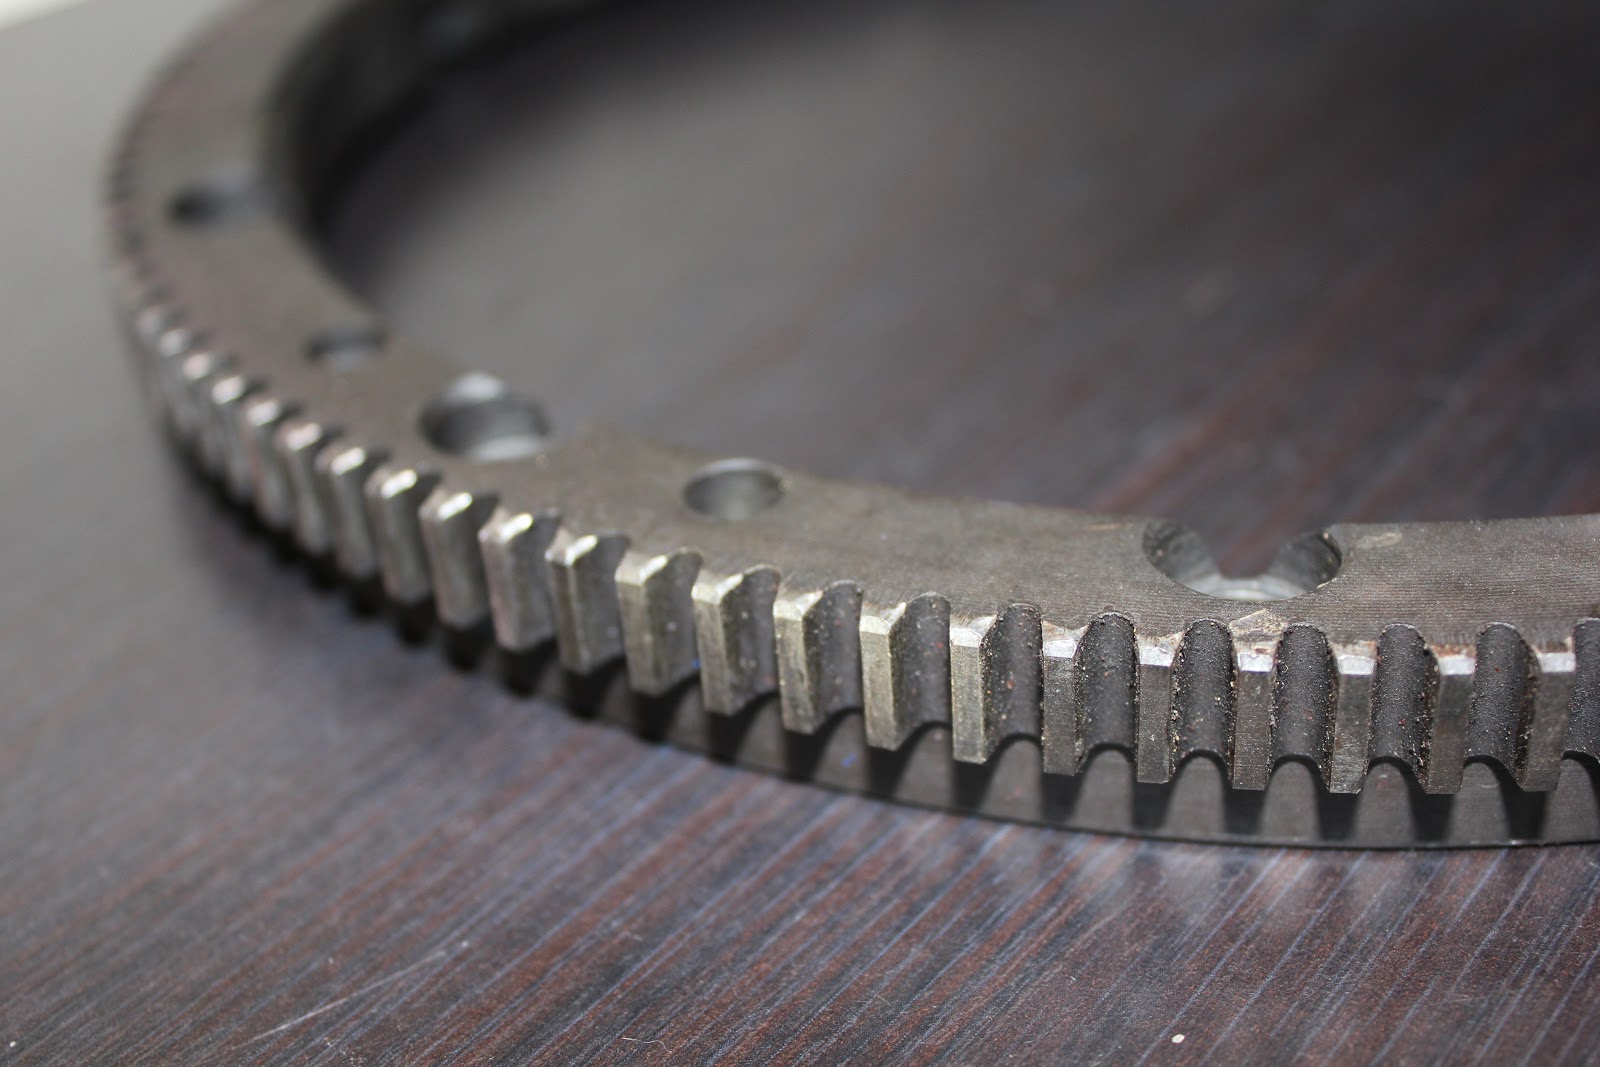
Top dead center can be confirmed through a small viewing window in the bell housing. Luckily when the flywheel was off, I put a bit of red paint on the mark.
The engine code can also be seen to the left, stamped into the block.
Cam gear is also showing TDC, so we are definitely timed in.

After removing the cam tower, intake and exhaust manifolds, etc..... The two bolts from the fwd head to block coolant passage, gave me some problems. They are M8 bolts with a 6mm allen head.
One had its head sheared off, and the other got stripped.
 The one with the stripped head was easily removed after pounding a 12mm 12point socket on it. (these M8 bolts have a cylindrical head that is 13mm wide)
The other with the missing head I double nutted after taking the cylinder head off, and after much frustration, it finally came out...... along with all the threads in the block.


Yet another issue.... Chose to go with a timesert instead of a helicoil. It's a threaded bushing instead of a coil, and it won't back out since after it's interested it gets stretched open, and locks itself in place.

 Obviously new bolts were in order, so I will try these titanium ones.
Significantly lighter as you can see from the scales. Who cares about 10 grams, they are the same same strength as the steel ones, but will not corrode.


Whit this occasion coolant pipes and elbows that were neglected before, got a bit of paint.


Monday 11 February 2013

New clutch.

The clutch disk was much below the replacement limit. It was worn down to the rivets which than scored up the flywheel. Unfortunately the glazed and badly worn flywheel could not be resurfaced, so I had to a good used one. The new one is from an olde model, a 1984, therefore some pickups for a magnetic sensor are mission, but that's not a concern. That particular sensor is normally capped off in the engine bay, and only served some factory diagnostic function.

The vibrations I was getting during initial engagement into 1st gear, are now obviously due to the warped and badly glazed flywheel.

The new disk is about 8mm thick, while the old was 5mm. The original disk would have been rubber centered, so the clutch I am putting in now is at least the 3rd. Based on the mileage of the car, I doubt it would more than that. 
The starter ring gear bolts on to the pressure plate. I re-indexed it, so the engagement on the compression stroke wears a different set of teeth.
Using a couple of sockets inside each other (3/8" inside a 17mm), I aligned the clutch and installed the pressure plate.
A bit of red paint will show if any of the bolts have loosened.
  The clutch cover was pretty dirty, so a quick bead blast revealed some fresh aluminum.
Starter wires routed with new Adel clamps, and slave cylinder refitted.